Williams PIN·BOT (Williams, 1986) Mylar Removal

merkury

Inserted Coin
Joined
Nov 9, 2012
Messages
31
Reaction score
1
Points
9
Favorite Pinball Machine
Pin*Bot #549
So a little background... I bought a Pinbot about 10 years ago. It needed a lot of work, but it mostly worked. At the time, I just learned as I went along and I ended up pulling most of the parts off the playfield in order to clean it and replace the bulbs and rubbers. I played it a lot and I have even had it worked on by professionals a couple times. I had forgotten about him for a few years and then the other day I decided to flip the switch on. Well, the machine worked better than I remembered and the experience renewed my interest in finishing the job that I once started.

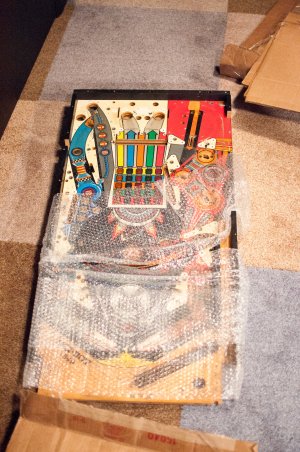
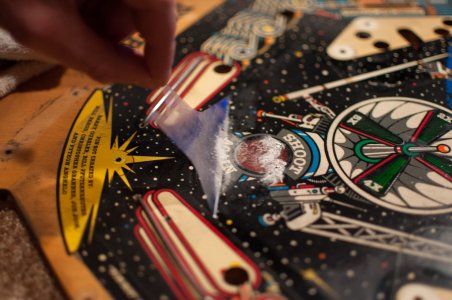
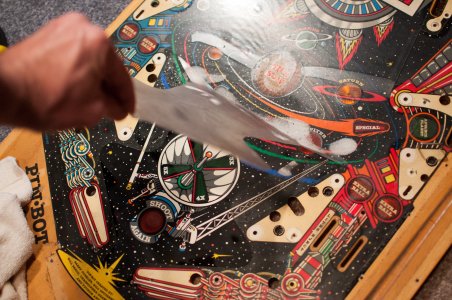
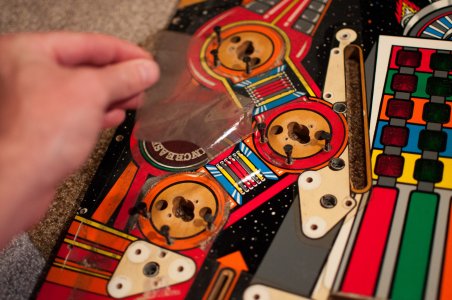
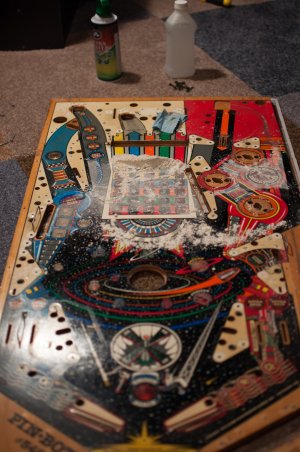
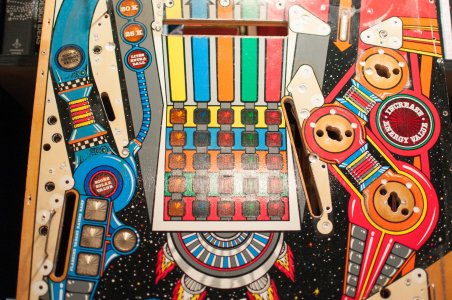
I have read a lot about removing the mylar from the playfield. I understand that it is inherently risky, so I bought a used Pinbot playfield on ebay tonight. I am comfortable with risking $150 on a really sweet playfield. I understand that there will be touch up to do.

With that being said, I want to chronicle the process here, and I would also like for anyone who has experience with this to please lend a virtual hand. This will be my first attempt at this, so I will need good advice.

As of right now, this is what I know. There are three methods of removal.
1) Hair dryer
2) Goo Gone
3) Freezing
If I were to start work right now, I would probably try a can of air held upside down first and if that didn't work I would move on to Goo Gone. I understand that I would need the Goo Gone anyway, to remove the glue after freezing. After the mylar is removed, I plan to touch up the playfield with paint and possibly clear coat it.

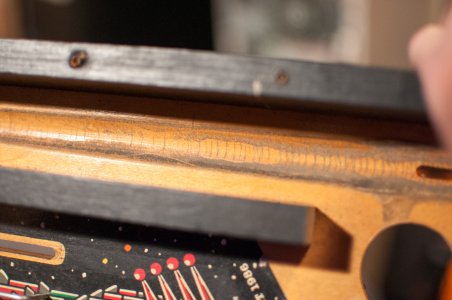
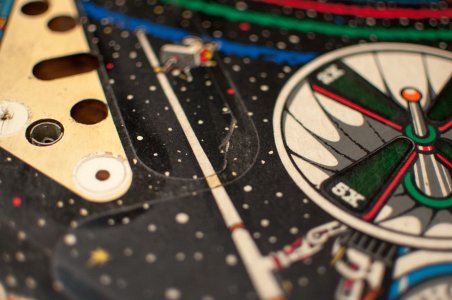
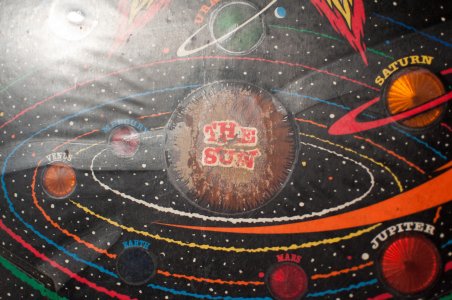
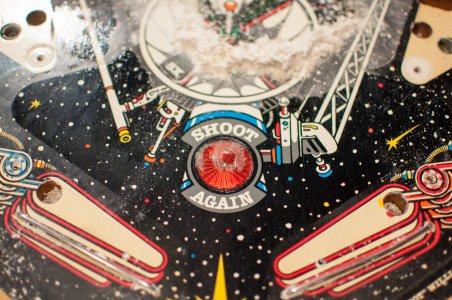
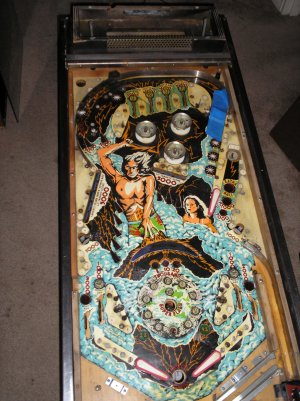
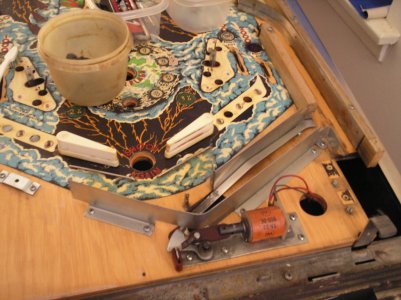
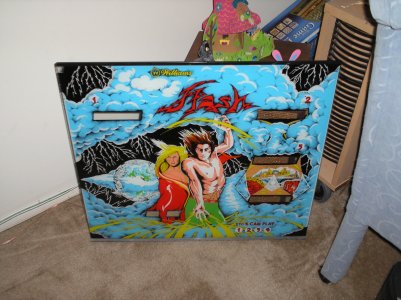
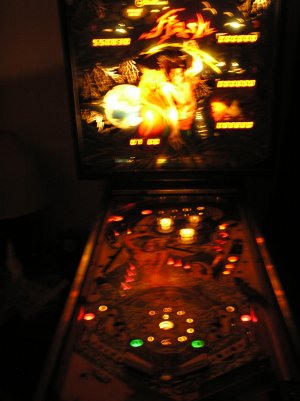
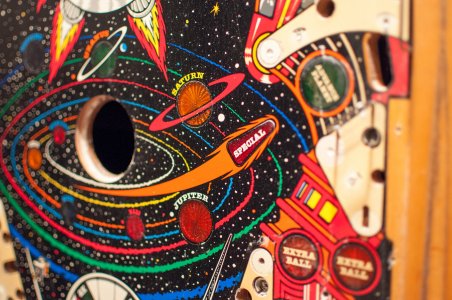
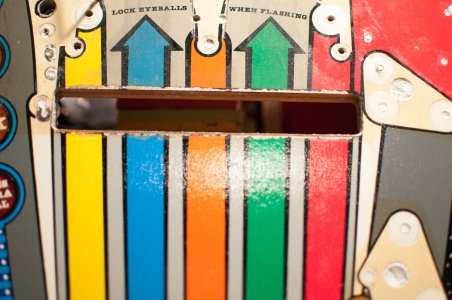
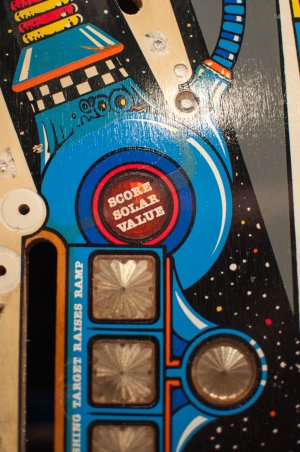
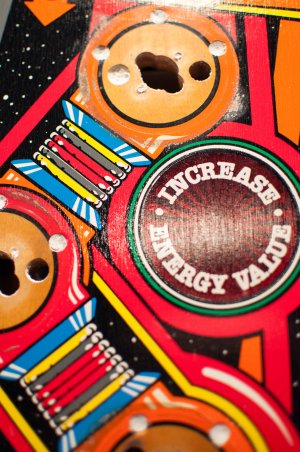
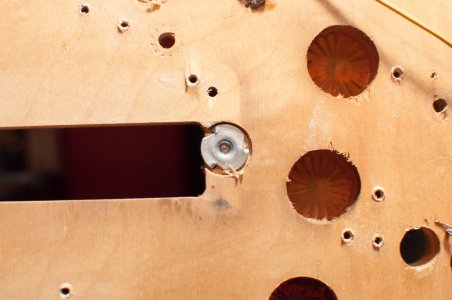
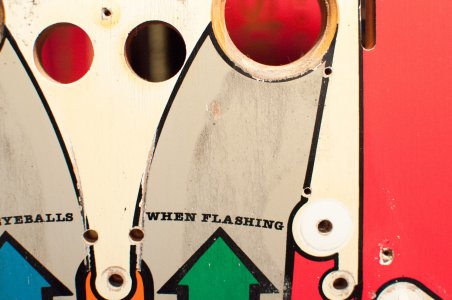
Here are the pics from ebay. I look forward to hearing from you all.

$(KGrHqFHJCUFB)ghfEVhBQlF7EeG5!~~60_57.JPG


$(KGrHqVHJDMFBl,wYNM-BQlF7ICdpw~~60_57.JPG


$(KGrHqRHJDQFBo6qHoS2BQlF7Me7Rg~~60_57.JPG
 
a heat gun would work but you must be VERY vigilant when using it
or it may craze or melt the mylar if you are not careful try it out in a hidden area first
it should peel right up when heated
 
goo gone won't touch the mylars adhesive but it WILL clean up any residual dirt
left on it from playing
freezing is risky due to the electrics under the pf
I don't think a standard hair dryer would have enough heat to peel it up but you can try
 
worse case scenario just polish the hell outta' the old one
with Novus #2 plastic polish then rub it out with novus #3
to bring back the shine
 
Alright, so the Pinbot playfield arrived today! Just in time for a long weekend! I have read several articles and watched some videos on Youtube about removing the mylar. I am convinced that using a freeze spray from a regular old air duster is the way to go. After the mylar is removed, there is an adhesive left that is best removed with goo gone, although I saw a method that used flour and rubbing alcohol.

I will post some more pics shortly. There are some areas that I would like some advice on. Also please comment, warn, chastise, etc. anytime and anything that I say. I have never removed mylar before, so I am posting this here as a way of reaching out to the pinball community for advice and also as a chronicle of either a great removal job or a warning of what could go wrong (hopefully a great job). Either way, I have paid $150 for the playfield and we are about to see if I wasted it.
 

Attachments

  • 20121121-Pinbot Playfield Arrival-012.jpg
    20121121-Pinbot Playfield Arrival-012.jpg
    2.4 MB · Views: 521
Well, I have begun the removal process and so far so good. I have about half of the main mylar sheet off. Here are a few pics of areas that are concerning to me, along with questions.

Will I be able to clean the white areas up to look white again?

The "Sun" insert seems to have gotten really hot. The middle of it seems sunken in. Anyone know if this is repairable?

The shooting trough has a cracked surface. How should I approach this?

Thanks for any advice. I'll post some pics of the mylar coming off later.
 

Attachments

  • 20121121-Pinbot Playfield Arrival-049.jpg
    20121121-Pinbot Playfield Arrival-049.jpg
    1.3 MB · Views: 491
  • 20121121-Pinbot Playfield Arrival-037.jpg
    20121121-Pinbot Playfield Arrival-037.jpg
    1.3 MB · Views: 570
  • 20121121-Pinbot Playfield Arrival-020.jpg
    20121121-Pinbot Playfield Arrival-020.jpg
    1.4 MB · Views: 607
Photos of mylar removal using an air duster. Clean up with flour and alcohol. It took about 30 minutes to remove all of the mylar. If you haven't seen this method, look it up on youtube. It worked so well that I literally wished there was more to remove when I finished. The cleanup that I started took over an hour. The adhesive is really thick and it looks like I will need to work on it for hours and hours to get it clean. I'm just glad that the paint stayed on so far though.

The Sun is really sad looking right now. I hope I can restore it. :(
 

Attachments

  • 20121121-Mylar Removal-005.jpg
    20121121-Mylar Removal-005.jpg
    1.2 MB · Views: 497
  • 20121121-Mylar Removal-009.jpg
    20121121-Mylar Removal-009.jpg
    1.7 MB · Views: 566
  • 20121121-Mylar Removal-015.jpg
    20121121-Mylar Removal-015.jpg
    1.7 MB · Views: 481
  • 20121121-Mylar Removal-020.jpg
    20121121-Mylar Removal-020.jpg
    1.4 MB · Views: 503
  • 20121121-Mylar Removal-030.jpg
    20121121-Mylar Removal-030.jpg
    1.5 MB · Views: 452
  • 20121121-Mylar Removal-078.jpg
    20121121-Mylar Removal-078.jpg
    1.4 MB · Views: 550
look at this site for ANY pin repair
it has three parts to the repair process
http://www.pinrepair.com/restore/index2.htm
also that lens you mention that is sunken in
you must pop it out, sand it down so it is flat again, then glue it back in

I am doing this for ALL the lenses on my newly acquired Flash Pin
as they are all concaved below the actual pf surface
and I think it is cornstarch that works with getting old mylar off
I lucked(?) out in that my pin does not have that mylar
but the play field ink is so worn down in places
I may have to do some coloring in to bring it back up to specs
Lucky for me the guy I got the pin from bought ALL brand new pf decals
for the pf itself plus EVERY light lens that has lettering on them
so I am safe there if I by accident scratch or ruin a decal
 
I am using Isopropyl alcohol to clean the pf
along with green scrubbie sponges and I tell ya
that stuff works wonders at getting old dirt and residue off the pf
especially the ball plunger lane
I cleaned the posts with my trusty 'Dr. Brohnners pure castile soap'
which is made from mostly peppermint and other oils is all natural
smells great and strips old wax and crud quick and easy!
but regular soap works just as well
I did it while watching tv
get an old bowl, some water, an old toothbrush,and your cleaner(s)
then during commercial breaks I just scrub a couple of posts,
the screw heads I polished up with my dremel drill kit
with a buffering wheel attached so that when put back
on they don't look shabby and out of place
as you can see the apron area cleaned up real purty like with only ISO
the lenses that are out must be redone like I mentioned earlier
the pf is filthy (that is the first day I got it it is much cleaner now!)
but again ISO and a bit of rubbing will clean most any dirt and residue off it
 

Attachments

  • Playfield.jpg
    Playfield.jpg
    682.5 KB · Views: 492
  • apron area.jpg
    apron area.jpg
    741.5 KB · Views: 423
  • Backglass.jpg
    Backglass.jpg
    722.9 KB · Views: 445
  • dark flash lit.jpg
    dark flash lit.jpg
    646.7 KB · Views: 435
Last edited:
look at this site for ANY pin repair
it has three parts to the repair process
http://www.pinrepair.com/restore/index2.htm
also that lens you mention that is sunken in
you must pop it out, sand it down so it is flat again, then glue it back in

I am doing this for ALL the lenses on my newly acquired Flash Pin
as they are all concaved below the actual pf surface
and I think it is cornstarch that works with getting old mylar off
I lucked(?) out in that my pin does not have that mylar
but the play field ink is so worn down in places
I may have to do some coloring in to bring it back up to specs
Lucky for me the guy I got the pin from bought ALL brand new pf decals
for the pf itself plus EVERY light lens that has lettering on them
so I am safe there if I by accident scratch or ruin a decal

Hey, thanks for the response faralos. Happy Thanksgiving! I have worked at the adhesive for a few more hours today and I guess I am about half way there. What I have found to work better is to coat the adhesive with flour, then use a pipette (eyedropper) to drip Goo Gone onto the adhesive. I let this sit for 5 minutes or so and then begin rubbing it with my fingertips. It balls up a bit quicker than with just alcohol and flour. I still use the alcohol too, but not as much as before. The inserts are really hard to clean and I just keep going over them with alcohol every few minutes. I need to take a few more pictures of my progress later.

The large "Sun" insert has actually loosened, which is good. Now I don't have to worry so much about how to remove it.

Some of the other inserts seem to be riding a little high. The special insert and the four bonus multipliers near the flippers are a little askew. Can you suggest a way to remove these? Also, the underneath of all the inserts are incredibly dirty. How do you clean them?

Thanks again faralos, I will be checking out the link you posted also. I have stumbled onto that site before and I really like the "guide" format that it provides. I found a nice presentation on actionpinball.com also. They break down their shop process, which is nice to read.
 
I pop the lenses out with a 3/8 deep socket wrapped in a washcloth
to minimize damage to the lenses flip up your play field
then hammer away (tap gently!) to loosen the lenses
they should (it says here in fine print!) 'pop' right off the play field!
mine did with gentle tapping washing them or using ISO
will take care of any dirt or residue on the under sides of the lenses
 
on that same page I posted about is this for the lenses...take a deep breath:
[FONT=verdana,arial,helv,helvetica][SIZE=-1][SIZE=+1]3e. The Mechanics: Sunken/Cupped/Low/Loose Playfield lamp Inserts[/SIZE]
  • This is a very common problem, especially on older woodrail pinballs. The plastic lamp inserts in the playfield (PF) shrink in size, and become lower than the playfield playing surface. Or the inserts just fall out when the playfield is raised! If an insert is too low, this will make game play odd. Sometimes to the point where the ball will get hung up on the low insert.
    On 1950s pinballs in particular, it is NECESSARY to remove ALL the playfield inserts and to reseat them. I can guarentee they are all sunken below the level of the playfield. If left alone, this will wear the playfield around the inserts, and make the game play badly. On 1960s and 1970s pin games this is less of an issue, but as time marches on, these games too will need their inserts re-seated. (I have needed to do this on games as late as the 1980s.) If you are going to touch up and clearcoat a playfield, reseat the inserts BEFORE you do any of that work.
    First try and get the insert out of the playfield. Sometimes they just fall out, other times they are a bear to remove. Use a socket to gently knock the insert out from the bottom of the PF using a small rubber mallet. The reason sockets work very well is because they come in so many sizes, and you probably have a toolbox full of them. Use the largest that will fit in the insert route from under the playfield.
    Do NOT force the inserts out! If they don't come out with just a few light taps of the mallet, use a hair dry from under the playfield to soften the glue, allowing the insert to come out easier. Do not use a heat gun (too hot). If you pound the insert real hard it can break the top off the insert, leaving the sides still glued in the playfield. This is fixable, but it's obviously ideal to get the insert out in one piece. The hair dryer tip works really well for this. Put the hair dryer nozzle right up against the insert from the BOTTOM of the playfield, and turn the hair dryer on "high". Feel the insert from the top of the playfield. Once warm, remove the heat and tap with the insert with the socket/mallet from the bottom of the playfield to pop out the insert.
    Sometimes inserts are "cupped". If this is the case, the top of the insert will need to be leveled before re-installing. If the insert has no text or graphics, remove the insert and block sand the top face flat (turn the insert face down on a piece of 400 grit wet/dry sand paper on a solid block and sand). If there are graphics or text on the insert, water-thin Super Glue can be added to the top in THIN layers to build it. After several layers (and the superglue is dry), turn the insert face down on a piece of 320 or 400 grit wet/dry sand paper on a solid block and sand (wet). Then move to 600 grit and finally 1200 grit, then reinstall. When you polish the playfield (Novus2) that will also polish the leveled insert. Note using heat to soften the insert and then trying to push the top of the insert up/flat really does not work. The added heat will only make the insert worse, and it usually is not correctible.
    Now its time to reinstall the insert. There are two ways to go. Thick superglue (SG) around the edge of the insert, reseat, level, wipe off any excess from PF, let dry. Then (optionally) add water thin Superglue around the top-side edges of the playfield/insert to seal the insert better and permanently. Any SG that gets on the playfield should be wiped off immediately before it solidifies. Polish with Novus2 when dry. If the playfield was waxed before this process that is a good thing to some degree - the wax will prevent any excess waterthin Superglue from taking hold on the top side of the playfield as you wipe it off (but don't over-wax as wax tends to get into the gaps between the playfield and inserts, causing glue adhesion problems between the insert and playfield).
    If using the Super Glue method to glue inserts, make sure the playfield is CLEAN *before* attempting the re-glue. Otherwise when you wipe off any excess super glue from the top of the playfield, you can accidentally "lock in" the dirt to the playfield's finish. Short of sanding, you will never get that dirt out.
    The other way is to take some brown paper packing tape (like used at butcher shops, not the plastic shipping tape), and put a layer or two around the edge of the insert. Wrap the brown tape so it is slightly below the top side of the insert (so the tape won't show when the insert is installed). Trim the excess tape on the bottom side of the insert with a razor blade. Wrap enough tape around the insert so it fits snug into the playfield. Then remove the insert and put yellow carpenter's glue around the PF hole, install the insert and level it. Work some carpenter's glue into the insert/playfield edges from the top side of the PF, and check the levelness again. Wipe up extra glue with a wet rag, let it dry overnight.
    The second method is less caustic and reversible. It's also easier for the newbie, but both methods work well.
    In regards to leveling the insert. I like to use a piece of plastic acrylic that is larger than the insert. Lay this on the top side of the PF. Push the insert up from the bottom side of the PF while keeping pressure on the acrylic plastic on the top side. This should make the insert level.
[/SIZE][/FONT]
 
Good stuff faralos. Thanks. I pulled the sun insert out by hand. It was really loose, like a kids tooth. I finished removing all of the mylar adhesive. I have gotten pretty good at it. My latest technique (especially on the inserts) is to use a lot of flour, so much that it acts like a buffer between my finger tip and the playfield. It is almost acting like a really fine sandpaper. I also used the same flour repeatedly rather than getting fresh all the time. I really blew through the last bit when I made it up to the matrix inserts. Don't get me wrong though, it really was a lot of work. Here are the pics, there is still some flour here and there. I wiped it down with a shop towel, but tomorrow I will try some naphtha on it. I tried to get some reflections to show the texture of the surface.
 

Attachments

  • 20121122-Mylar Removal-003.jpg
    20121122-Mylar Removal-003.jpg
    1.3 MB · Views: 499
  • 20121122-Mylar Removal-007.jpg
    20121122-Mylar Removal-007.jpg
    1.9 MB · Views: 519
  • 20121122-Mylar Removal-012.jpg
    20121122-Mylar Removal-012.jpg
    1.6 MB · Views: 481
  • 20121122-Mylar Removal-014.jpg
    20121122-Mylar Removal-014.jpg
    1.5 MB · Views: 475
  • 20121122-Mylar Removal-015.jpg
    20121122-Mylar Removal-015.jpg
    1.3 MB · Views: 472
  • 20121122-Mylar Removal-017.jpg
    20121122-Mylar Removal-017.jpg
    1.6 MB · Views: 463
Just had a good look at your pics finally. You are right, the apron area did clean up good with the ISO.
 
I'm new to the thread but I would have never removed the mylar as you likely will lose paint with it. I've done several pins myself, and even mylared one that didn't have it.
 
I'm new to the thread but I would have never removed the mylar as you likely will lose paint with it. I've done several pins myself, and even mylared one that didn't have it.

So I take it you are surprised by my results? Please understand that I bought this playfield with the sole intention of removing the Mylar. I have owned a fully working pinbot for about 10 years. My machine has wear in several spots that is bad, I mean no paint with wood showing. Even so, I didn't want to risk ruining the game just to rip the Mylar off. I took a gamble though, bought a second playfield, and right now I couldn't be happier about the way it is turning out. I may have the playfield coated with an automotive grade clear coat. I will decide on that once I try to clean it and do any touch up.

Thanks for weighing in on the topic. I can understand your concern. My understanding is that with a properly waxed and maintained playfield you should get zero wear. I wish more people would give their opinion though. That is why I started the thread.
 
I do see little pieces of paint that are missing (maybe due to adhesive), but a properly maintained pf will get little wear, not zero. But, in a home use environment, it's a non issue as it won't be played 14 hours a day, well, maybe for the first few months. But it looks like you being extra careful has paid off because although I wouldn't have done it, but you have pulled it off without any real damage so kudos on that. Of course when I was doing this stuff these games were much newer (I used to be an operator by the way).
 
Thanks for the kudos Itchigo. There was minimal damage I assure you. Only around a few inserts was there minimal lifting. I suspect that you are seeing bits of flour still sitting around or actual playfield wear where there was no mylar. There appear to be microscopic cracks under the paint also, running with the wood grain. They are only noticeable with the camera really. I am about to go after it with some real cleaning. I'll be back with more pics later.

One more question for anyone following this. I have a few metal rails that are still attached to the playfield. There are two, for example, along the lanes leading to the flippers. There are two more under the flippers, flush with the playfield. Are these removable or best left alone?

PS - You shouldn't have told be you were an operator Itchigo. Now I will have to bug you when I have bigger problems down the road. :help:
 
Hey faralos, I was checking my "Sun" insert out more last night. I am not sure that it is thick enough to sand out the concave dip in it. Have you ever used superglue to fill them in as an alternative? I read somewhere that you could apply it in many thin layers and then sand it off level. Just so you understand, the insert back is hollow. I think that when I sand it, the rim of the insert will separate from the center before I get rid of the dip.
 
The cracks in the paint are just age, it happens to all pins eventually. The mylar hides this. For the sun insert you could take some masking tape from the bottom side and use it to hold the sun insert to the correct (flush) height, then glue around it. I've used superglue way more than I probably should have, so it'll probably be ok. I'm not sure I'd worry about the center being concave though. It happens from the heat of the light bulb. You may be able to find an insert on e bay cheap though.
 
[FONT=verdana,arial,helv,helvetica][SIZE=-1]If there are graphics or text on the insert, water-thin Super Glue can be added to the top in THIN layers to build it.
from that long post above this
I only said to pop them out if they can be done so easily
some of mine I can't budge so will start to layer super glue on their tops
then sand them down to the pf level
you can also use Future Floor Finish which is an acrylic finish
that is self leveling and hard as nails once dry
it can also be sanded and polished (novus products)
and yes some of my lenses also are super thin with that hollowed back
as you mentioned so they will be built up on the top side with super glue
THEN sanded down to the original pf height
[/SIZE][/FONT]
 
oh and those Mr. Clean Magic Erasers work fantastic for getting out ball swirls
and the dark lines caused by the balls
just get the ones with NO bleach in them
and use ISO NOT water for your liquid agent
as water will raise the wood grain on the pf and ISO will not
 
as for those metal rails if they are pop riveted leave them alone
but if they are held down with screws by all means take them off
I have a few that I left on (the ball deflector one in the plunger lane comes to mind)
due to their being riveted onto the pf sides
oh not only did I work on pins for about ten years
I also was an operator at a Chuckie Cheese where we had ALL the games in place
Pins, Video games ,including a few sit down ones,
all the rides (hydraulics suck to work on!)
and the stage characters which also were piston driven with hydraulic pumps
those we had to learn as we went since they had no instructions on how to fix them
they were fun to say the least, nothing like leaking hydraulic fluid running down your arms
while trying to bolt a leg or two on to the damn thing!

Nothing like some Chuckie Cheese :) I remember a place here called Showbiz too. It was like Chuckie, but there was a big ape instead of a mouse. lol.

Here is a picture of one of the rails. Not a great shot of it (just to the left of the left eye socket hole), but there it is. The one on the right is actually missing. There are a few more of them here and there. I'll leave them alone though as there are no screws. As far as I can tell, the holes do not even break through the bottom of the playfield. I hope I don't have problems replacing the missing one.
 

Attachments

  • 20121122-Mylar Removal-008.jpg
    20121122-Mylar Removal-008.jpg
    481.5 KB · Views: 427
Just finished a Naphtha wipedown. Found a broken screw. The nut on the bottom of the playfield should just pop right out, right? I plan to "punch" it out from the top using another screw or nail.

I'm going to try the magic eraser lightly on these swirl marks.
 

Attachments

  • 20121123-After Naphtha-048.jpg
    20121123-After Naphtha-048.jpg
    1.1 MB · Views: 410
  • 20121123-After Naphtha-023.jpg
    20121123-After Naphtha-023.jpg
    1.4 MB · Views: 419
General chit-chat
Help Users
You can interact with the ChatGPT Bot in any Chat Room and there is a dedicated room. The command is /ai followed by a space and then your ? or inquiry.
ie: /ai What is a EM Pinball Machine?
  • No one is chatting at the moment.
      Chat Bot Mibs Chat Bot Mibs: roachie has left the room.
      Back
      Top