VP animated Bumpers tutorial.

StevOz

Administrator
Staff member
Site Supporters
Joined
Jun 16, 2003
Messages
3,952
Solutions
7
Reaction score
2,168
Points
151
Favorite Pinball Machine
TMNT
In this series of posts I will explain how to create animated pop bumpers within VP, using perfect circles and side visible drop walls as used in my latest release StreetFighter.

First off, I'd like to thank those previous authors that discovered some of the various techniques I'll be using here.

Stein for the perfect circles, Shiva for discovering default VP pop bumpers are rendered to low by default and whomever was first to use dropwalls to animate pop bumper rings.

First off you need a perfect circlular wall which you can create using Steins guide to creating perfect circular walls or you can just copy and paste one from any of my tables or the examples that will appear here.

Steins guide is available here..

http://www.vpgd.net/

You only ever need one perfect circular wall, others can be created via the VP editor copy (cntrl c), paste (cntrl V) and using the right click on the VP wall scale/translate features.

Also here is a pic of a real pop bumper ring, I find it always useful to check these thing out, so as you can try and create the most realistic effect.


Attached is stage 1, an example table with 1 perfect circular wall and a VP pop bumper with it's side set to black to make the side invisible, several circular walls will be placed within the pop bumper object to replace that side image, to render a more realistic looking pop bumper.
 

Attachments

  • bump1_134.zip
    30.8 KB · Views: 322
Next we add a dummy wall renamed bumperheight with the side and top not visible and a top height of 15 in this example, this will be used to render the pop bumper higher, more realistically. Create this wall somewhere off the side of the table. Click on the bumper1 object and set the surface to bumperheight. Note the value 15 can be whatever you feel looks correct, shiva uses 20 as I recall, though he also renders his plastics higher for his recreations which is more then likely correct for that application though here I'm creating an original basic example based upon my last build here.

Also goto the backdrop and set the Incination to 48 for a fuller view of this table. I also lock all my objects to avoid accidentally moving them when clicking, they can still be moved by changing the values in the options menu, which i feel produces far more acurate and pleasing results.

Feel free to ask questions here at any time.
 
mmpac uses two of those walls. one for the ring, and one to reflect that ring on the playfield.
If you raise that pop to a surface setting wall's hight, you shoulds model the base if you want to look at your table with a shallow inclination. Four of your perfect circles like the circles on a 3/4 inch square lego 10 units or so high, but if you surface wall is higher than that I think it is too high.

Otherwise, what he said.
 
Steve, where's the finished product? I wanted to see some moving bumper rings. I just played a couple of JP's tables (SILVER) and he has 4 drop wall bumper rings for each bumper (cool stuff) and I thought maybe that's what you had in your tutorial.

BTW, you posted this in the wrong forum, I tried to find it in the Tutorial forum.
 
Just take the code from one of the se3 tables bob, I've been using the 4 stage bumpers for years, but then I was the one that developed the wall effect in the first place. Not hard to work out, and Steve already told people about the graphics.

BTW, I use 20 as the height, because I use 60 as the height for the plastics (65+20=85) Most people use 50, but the ball height is 50, so I have a bit of clearance. The plastic height should really be 65, 5 for the thickness of the plastic, and a full 10 units difference between the ball height and the bottom of the plastic, that's what I eyeballed with actual games, but 60 is a nice even number and makes it easier to work out the math if you have ramps and upper level structures
 
shiva said:
Just take the code from one of the se3 tables bob,

Shiva, I downloaded the SE3 and it only has regular bumpers. I looked at KISS, those bumper rings are great, but graphics are locked and bumper script is in vbs file. I know how they work from JP's SILVER table, I think I'll ask him if I can use his code. Thanks for offer, I do use alot of stuff from the templates that VP authors have created. Without you and Bendigo, my tables would totally suck. :wink:
 
Okay, np. I grabbed Silver, and had a look, JP's settings and names are very similar in the editor, it's just the code that's quite different. I made mine as simple and basic as possible code wise, so it may be a bit easier for beginners, as it's really spagetti code
 
shiva said:
Okay, np. I grabbed Silver, and had a look, JP's settings and names are very similar in the editor, it's just the code that's quite different. I made mine as simple and basic as possible code wise, so it may be a bit easier for beginners, as it's really spagetti code

That was my problem, JP's code looked like it was in code, if you know what I mean. My scripting is as basic as basic can be, here's what I do now for a bumper.... I just wanted to see a simple way of dropping the other 3 bumperRings. I would do it with 3 more Timer subroutines, but I'm sure Steve would do it with collections and I just wanted to check it out.


Code:
Sub Bumper1_Hit()
    PlaySound "Bumper"
    AddScore 1
    SkirtDark1.IsDropped=True
    Bumper1Flash.IsDropped=False
    BumperRing1.IsDropped=False
    Me.TimerEnabled=true 
End Sub
Sub Bumper1_Timer
    Me.TimerEnabled=False
    SkirtDark1.IsDropped=False
    BumperRing1.IsDropped=True
    Bumper1Flash.IsDropped=True
End Sub
 
Yeah, I noticed that with his code. Seemed rather complex for what it does.

Create 3 bumpers. Name them bumper1, bumper2, and bumper3. Check timer enabled, set it to 11

Create 4 walls, set them to their heights.I name my 4 rings for each bumper... b1a for the top ring (highest), b1b for the second ring, b1c for the third ring, and b1d for the fourth (lowest ring). bumper2 would be called b2a, b2b, b2c,b4d etc. I use custom graphics, so use the settings in Silver, as my sizes are odd, should work.

Okay, create 2 collections.
One collection called Bumpers, and place the 3 bumper objects in there

Create a second collection, call it BumperRings, and put in the rings (added a screenshot to show you)
I put the "b", "c", and "d" rings for each bumper in that collection, but not the "a" ring.

You can use the code snippets, it should work after a brief modification for a non-se3 table. You should place a call to SetBumpers1823() at the table Init, and also at the start of a new ball

Grab the code snippet for the bumpers from the Playboy table, that's a good 3 bumper script, and there's nothing else contained within, and very heavily commented.

Remove this section in Sub Bumpers_Hit( Index )

Code:
If HoldBumperSound=0 then ' check that variable is set to 0 or "off"
			StopAllSounds() ' stop sounds if playing
			
			' we use the GetScoreBells variable to decide if we want to use the built in sound
			' system for Bally/EM type scoring or not. If we don't then set GetScoreBells to 0
			' and add the sound here. The GetScoreBells feature, if on (GetBalls=1) will play a set
			' sound, and is already added to the engine
			If GetScoreBells=0 then PlaySound "Bumper2" ' Play the electronic sound for the bumpers
			
			HoldBumperSound=1 ' set variable to prevent the sound playing until we want to
		end if
you may want to remove the if gameover=0 then lines as well, it's the same as se2, so you should be okay.
Code:
' code snippet file for use with shivaEngine3 
' released: 5.25.06
'
' *** COPYRIGHT NOTICE ***
'
' written by shiva
' Thanks to all the other authors
' Contact Info : [email][email protected][/email]
'
' All rights are reserved by p.d.sanderson (shiva)
' You may release, or modify for release any portion of this product, as long as it is not 
' part of a commercial product or venture. 
' This code snippet was meant to be expanded, so please contact the author for additions 
' to this base script. All submissions welcome.
'
' The above copyright and remarks MUST be included with this table. Please credit use of
' this script for your own tables.
'
' Please keep any modifications for release as separate code snippet files so others can use 
' it for their tables.
'
' *** 1823 - (Playboy) Bumpers ***
'
' Now we use the examples above, but expanded, for our bumpers. We use drop walls, like the wire triggers
' and a collection for the bumper hit, to make a realistic effect for our bumpers.
' You need to create a collection called Bumpers, make 3 bumpers, and add them to the collection.
' I use a my own created system to simulate "Bumper Rings", a series of walls set to different heights
' with custom graphics, but it's a lot of work to set up and make work, so I won't explain it.
' The code is written so that you can just copy and paste the Bumpers_Hit(Index) subroutine, just
' REMOVE the "If HoldBumperSound=0 then", the "HoldBumperSound=1" and the "end if" lines and it will work
 
Dim bw1,bw2,bw3  ' variables for bumper ring control
 ' Optional, this "evens" out the sound a bit
Dim HoldBumperSound ' this prevents a second Bumper sound from playing until the first sound has stopped

' First, we set up our code for the engine to read and set the opening variables at Table Start, and for
' each new ball. We call it by the sub name: SetBumpers1823() and place it in the SetNewBall(). A lot easier
' to have one line instead of several. and also, this means you can set up your game very quickly
' without getting confused, or worse, getting the script confused.
' We also do a cheap and nasty way for a tilt state. We could set up tilts to disable objects as separate
' routines, but we do it here instead. We get a "false bump", but it's better than confusing everyone
' with multiple routines and hooks. 
 
Sub SetBumpers1823()
 
' We reset all the variables, these control the ring effect walls for each bumper
 	bw1=0:bw2=0:bw3=0
 
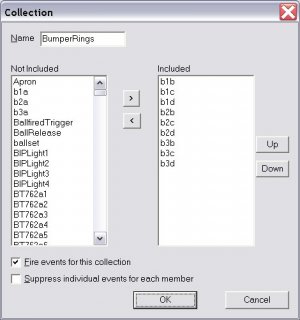
' Now we point to the BumperRings Collection. Since the rings are actually walls that are droppable, we
' use the target code, and make sure each ring is dropped
 	For Each target in BumperRings
     	target.IsDropped=1 
 	Next
 
 ' If we tilted, we disable the bumpers in the next subroutine, so we better turn them back on.
	Bumper1.disabled=0:Bumper2.disabled=0:Bumper3.disabled=0
 
end sub

' Here's the collection code, and serves as the main routine to control everything. We add each bumper to 
 ' this collection, so we can have this one bit of code to control all of the bumpers.
 
Sub Bumpers_Hit( Index )

 	' check the tilt state. tilt=0 means we are NOT tilted. Any other value would mean we are tilted
 	If tilt = 0 then
		PlaySound "Bumper"
 
 	' Hold the sound. We use the HoldBumperSound value to control this. If it's 0, then play the sound
 	' and then set the variable value to 1. We reset the variable back to 0 in the case settings for the
 	' individual bumper rings, so that way, we don't need a separate timer.
 	' We do this because the bumpers in Playboy are pretty close together, so a ball will trigger multiple
 	' hits within a second, and though the sound is switched off at each hit, it still sounds terrible
		If HoldBumperSound=0 then ' check that variable is set to 0 or "off"
			StopAllSounds() ' stop sounds if playing
			
			' we use the GetScoreBells variable to decide if we want to use the built in sound
			' system for Bally/EM type scoring or not. If we don't then set GetScoreBells to 0
			' and add the sound here. The GetScoreBells feature, if on (GetBalls=1) will play a set
			' sound, and is already added to the engine
			If GetScoreBells=0 then PlaySound "Bumper2" ' Play the electronic sound for the bumpers
			
			HoldBumperSound=1 ' set variable to prevent the sound playing until we want to
		end if
  
		AddScore 100 ' adds 100 points

 	' The "else" statement means other than, or in simple terms, if tilt is not 0 but a different value
 	' which in this case means we have tilted the ball. So using the else statement, we can have code
 	' for what we want to do if we are tilted.
 	else
 
 		' And here's our code to disable the bumpers if we tilted. It doesn't work for the FIRST
 		' hit, but will every other hit. A VP thing...
 		Bumper1.disabled=1:Bumper2.disabled=1:Bumper3.disabled=1
 
 	end if
end sub

' Yes, you can write a collection code, and still write code for each object as well. This is for
' setting the ring effect to the proper bumper. You can do this as a collection as well, but it's
 ' easier for beginners to understand this better
 
Sub Bumper2_Hit : if tilt=0 then BumpRing2():end if:End Sub
Sub Bumper1_Hit : if tilt=0 then BumpRing1():end if:End Sub
Sub Bumper3_Hit : if tilt=0 then BumpRing3():end if:End Sub
  
' Bumper 1 (Left)
Sub BumpRing1() 
   	if bw1=0 then ' MAKE SURE SET TO 0 TO DROP FIRST RING OF FOUR, WITHOUT INTERFERENCE FROM MULTIPLE HITS
   		Bumper1.State=0 ' turn off the bumper light to "flash"
 		b1a.IsDropped=0:b1b.IsDropped=0:b1c.IsDropped=0:b1d.IsDropped=0 ' all ring walls up
  		Bumper1.TimerEnabled=0 'stop bumper ring timer if on
  		b1a.IsDropped=1:Bumper1.TimerEnabled=1 'drop first ring, start timer
   	end if 
end sub
  
' controls bumper ring wall control 
Sub Ring1Control()
 
  	bw1=bw1+1 'increase value by one, and read corresponding case number
 
   	select case bw1 'loops thru timer
 		case 1:b1a.IsDropped=1:b1b.IsDropped=0'rings going down
   		case 2:b1b.IsDropped=1:b1c.IsDropped=0
   		case 3:b1c.IsDropped=1:b1d.IsDropped=0
   		case 4:b1d.IsDropped=1:b1c.IsDropped=0'rings going up
   		case 5:b1c.IsDropped=1:b1b.IsDropped=0
   		case 6:b1b.IsDropped=1:b1a.IsDropped=0:Bumper1.State=1
   	end select
 
   	If bw1=>7 then 'case 6 is done, so end process
   		bw1=0:b1a.IsDropped=0:b1b.IsDropped=1:b1c.IsDropped=1:b1d.IsDropped=1' reset variables and walls.
 		HoldBumperSound=0 'Next hit in the bumpers, the sound will now play
   	else
   		Bumper1.TimerEnabled=1 ' if all cases are not done yet, go to timer to start next effect
   	end if
 
end sub
 
' Timer for ring delay, and then we loop back to continue the next case. 
 ' The interval is controlled by the bumper object in the editor
Sub Bumper1_Timer()
 	if gameover=0 then
		Bumper1.TimerEnabled=0:Ring1Control() 'back to loop
 	end if
end sub
   
' Bumper 2 (Right)
Sub BumpRing2()
    	if bw2=0 then
   		Bumper2.State=0:b2a.IsDropped = 0:b2b.IsDropped = 0:b2b.IsDropped = 0:b2d.IsDropped = 0
   		Bumper2.TimerEnabled=0:b2a.IsDropped = 1:Bumper2.TimerEnabled=1
    	end if
end sub
 
Sub Ring2Control()
   	bw2=bw2+1
    	select case bw2
    		case 1:b2a.IsDropped=1:b2b.IsDropped=0
    		case 2:b2b.IsDropped=1:b2c.IsDropped=0
    		case 3:b2c.IsDropped=1:b2d.IsDropped=0
    		case 4:b2d.IsDropped=1:b2c.IsDropped=0
    		case 5:b2c.IsDropped=1:b2b.IsDropped=0
    		case 6:b2b.IsDropped=1:b2a.IsDropped=0:Bumper2.State=1
    	end select
    	If bw2=>7 then
    		bw2=0:b2a.IsDropped=0:b2b.IsDropped=1:b2c.IsDropped=1:b2d.IsDropped=1:HoldBumperSound=0
    	else
    		Bumper2.TimerEnabled=1
    	end if
end sub
 
Sub Bumper2_Timer()
 	if gameover=0 then
 		Bumper2.TimerEnabled=0:Ring2Control()
 	end if
 end sub
  
' Bumper 3 (Bottom)
Sub BumpRing3()
    	if bw3=0 then
   		Bumper3.State=0:b3a.IsDropped = 0:b3b.IsDropped = 0:b3b.IsDropped = 0:b3d.IsDropped = 0
   		Bumper3.TimerEnabled=0:b3a.IsDropped = 1:Bumper3.TimerEnabled=1
  	end if
end sub
 
Sub Ring3Control()
   	bw3=bw3+1
    	select case bw3   		
  		case 1:b3a.IsDropped=1:b3b.IsDropped=0
    		case 2:b3b.IsDropped=1:b3c.IsDropped=0
    		case 3:b3c.IsDropped=1:b3d.IsDropped=0
    		case 4:b3d.IsDropped=1:b3c.IsDropped=0
    		case 5:b3c.IsDropped=1:b3b.IsDropped=0
    		case 6:b3b.IsDropped=1:b3a.IsDropped=0:Bumper3.State=1
    	end select
    	If bw3=>7 then
    		bw3=0:b3a.IsDropped=0:b3b.IsDropped=1:b3c.IsDropped=1:b3d.IsDropped=1:HoldBumperSound=0
    	else
    		Bumper3.TimerEnabled=1
    	end if
end sub
 
Sub Bumper3_Timer()
 	if gameover=0 then
 		Bumper3.TimerEnabled=0:Ring3Control()
 	end if
 end sub
 

Attachments

  • ring_202.jpg
    ring_202.jpg
    37.4 KB · Views: 801
I feel pretty stupid right now.... I've never took the time to learn "Case" I have used a few collections, but I try to avoid them also. :) I think I understand them, I just don't like learning anymore. I think I can do everything with If/Then statements :) but I prefer copy/paste. Thanks for the flowchart.... I will figure it out.
 
Well, like I said, I'm not to swift with CASE or collections, but I'm a whiz with If/Then's :) Here's my animated bumper for dummies....

I added a line to the Bumper Hit sub...

If b1=0 Then Bumper1Rings

I need to know if that's really needed? I thought that if a ball hit the bumper, while it was already in the process of dropping the bumper rings, it would already be in motion, so I didn't want to start the events again.

I also thought that maybe it would be nice to have a tutorial with 3 different bumpers scripted differently, sort of a dummy, average or skillful level of scripting. I'll settle for the dummy level, because I understand what's happening in mine.
 

Attachments

  • bumperanimation_390.zip
    36.3 KB · Views: 300
Code:
 Sub RaiseRings
 
 	For each wall in Rings
 		wall.isdropped = true
 	Next
 
 End Sub
 
 Sub Bumpers_hit( index )
	PlaySound "bumper4"
	PlaySound "sfa2-085"
  	rings( index ).isdropped = false
    Bumper1.TimerEnabled = true
	AddScore 100 + BxLights( index ).state * 900
 End Sub	
 
 Sub Bumper1_timer( )
   	Bumper1.TimerEnabled = false
 	RaiseRings
 End Sub
 
That's pretty Steve, but where's the zipfile? :)
 

Attachments

  • ramp296_121.jpg
    ramp296_121.jpg
    3.6 KB · Views: 701
Damn, at least your zipfile was downloaded twice, mine hasn't been downloaded.... Now go up there and download my animated bumper file and check it out. :dammit:
 
I grabbed it, just to see. 2 timers though, but one for the light underneath. You don't need that second timer, you can put it in the code for one of the rings, but other than that, about as simple and as easy to understand as possible. Nice Job
 
Thanks shiva! I now have 1 timer 8) for a 5 stage bumper ring animation and ambience lighting. I also added a simple bumper bmp for display purposes. I love the simplicity of the If/Then statement, I shall always always remain a beginner. :D

Now if I can get Steve or you to add a bumper animation using collections and Case statements for the more experienced scripter, I think we might have a useful tutorial. :idea:
 

Attachments

  • animatedbumper02_135.zip
    40.5 KB · Views: 289
Yeah, I have a 5 stage as well for my new layout, but 6 bumpers + insane detail (1100 just for the lower level so far there abouts) + too many timers active = FP type play on a less expensive computer

As to tutorials from me, I already stated that I can be considered almost fully retired, and I will only release things because of a lapse of judgement or a moment of weakness.
 
Shockman says you stole his idea for an animated pop bumper, Shiva. You should apologize and give him credit in your ShivaEngine.
 
Fuck you Hack. Shiva stold nothing that I know of. I can prove that you stold my credit though, you cock sucker, because we can all see it in black and white, and we all know who came up with that 100% fix, 2 days after comming up with a 90+ percent fix and posting that I thought it was not good enough and will come up with a 100% fix. I announced the range, and I posted to the vpm forum. You did nothing but either put in or leave after you took over with them, credit to you. I did it and I made it known to the VPM staff that it could be used in the .vbs files as well as the table scripts which would over-ride, so,

FUCK YOU hack
 
I see this has now become a competion between s and pd on who can be the biggest child in the community, especially on such a stupid subject like this.

The fact that yet once again, a thread that actually discusses pinball, has once again been hijacked, just makes it less and less likely there will be more threads. There are more important things in life than this, I myself am facing the most important day in my life tomorrow, and though I can be accused of behavior like this from before, all I want to do is talk about pinball to take my mind off of things, and not be dragged into things whether I want to be or not.

Is that really too much to ask people?

Bob, I will dl your new example at least, and see what you did.
 
I just eliminated the one Timer per your suggestion. I did try several ways to create a graphic for using on the bumper ring walls, but I couldn't get any to look right with the editor. I tried making a ring graphic, but transparencies don't seem to work very good with drop walls. I tried to make donut shaped bumper rings, but they seemed way too jagged, I also tried using the gradient option in Photoshop. I ran out of ideas to try :) I like alot of the animated bumper rings that I see where authors have used reels, but I don't want to get envolved with reels yet.

I hope Steve is on holiday, I haven't noticed him around for a few days....
 
as I said, with my method, you have to customise the graphics for each bumper, but it sounds to me that you are trying to be too complex with the graphics, and your heights are reversed. My method is different than standard now, but you have to take into account the size of the image needed to take into account the difference in the settings needed from the lowest ring wall, to the highest ring wall, and you have to set your dropped height accordingly, if you want to use the same image.

If your image is set to 50 pixels high, then all your rings should be 50 pixels difference between up and down height settings. A ring height should be 20/-30 as a example
 
I've removed the "ball through flipper fix" from the VBS files completely, Shocky so you can quit your whining now. There, that's a nice turd.

If you don't want to be dragged into something, Shiva, you might avoid saying things like 'who can be the biggest child in the community' you condescending twit.
 
He said that after you posted a lie to him that I told someone that I think he stold something from me. So I agree with him you are those things he called us!

I said fuck you because, Fuck you.

You are stupid too. It should not have been taken out after all this time, just the credit put to the right place, don't you think?
 
Forum activity
Help Users
You can interact with the ChatGPT Bot in any Chat Room and there is a dedicated room. The command is /ai followed by a space and then your ? or inquiry.
ie: /ai What is a EM Pinball Machine?
  • No one is chatting at the moment.
      Mibs Mibs: HZR has posted a new reply in the thread "Complete list of VB commands".
      Back
      Top