@polygame
Thanks for that link Steve. Blender is so bewildering with all the different menus and options....but it is good to have this tutorial
@TerryRed
Ya it is a real shell game getting a model to import into mixao that is optimal and have the export work properly and have the textures available to be
loaded into model importer.
Do you need help with a specific model or did you get it working ?
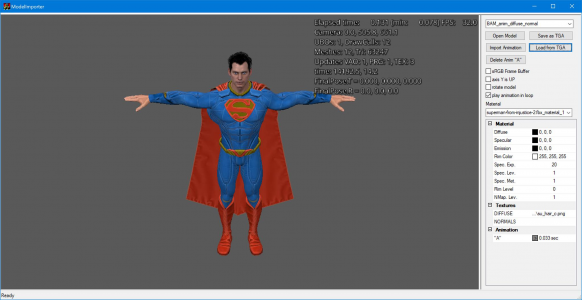
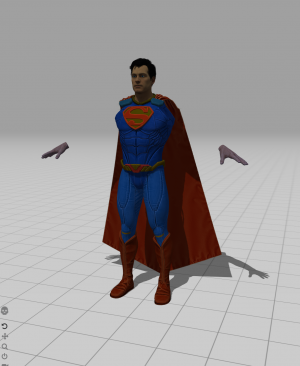
So far I've been good getting everything I wanted to try working. I think some models simply are way too large and have too much texture data for Model Importer to handle, is the reason some models don't work...even after they have been converted properly. (like the Superman example).
Key to success I have found for getting many characters with animation to work with BAM Model Importer:
- unip the model(s) and textures into a folder
- remove all other model formats except for the Object and mtl file. If there is only an FBX model, we'll try using that.
- you "may" need to import Object model into Milkshape (make any changes you want) and then resave as an Object again
- if you only had an FBX, then import into Milkshape (make any changes you want), then save as a Object
- you MUST edit the mtl file and remove the "paths" for each texture so you only have the texture names being pointed to
- zip up object, mtl, and textures,etc into a single zip file (no folders). No FBX files!
- upload that zip to Mixamo
- you usually know it worked "correctly" because you can see the textures appear on the model (not always the correct brightness, but its fine)
- add your rigging points to the model so it can be setup for animation
- pick your animation
- download as FBX, 30fps, with skin, no feyframe reduction
- import the new FBX model (with the new animation) into Model Importer
Choose each Material layer and add the correct texture:
- you may need to play with this to figure out what textures you need
- you can use milkshape to highlight "groups" for comparison. (Superman model had groups (same as material layers) for arms, legs, head, etc)
- many models come with multiple texture files, some may only come with one
- usually you will choose a coloured texture for each layer's "Diffuse" texture
- once you have all textures looking correctly for all layers, I'd recommend saving to a TGA at this point
- if the model saved to a TGA without causing problems or crashing, then carry on the rest
- now you can try adding any normal / bump map textures for the "Normal" textures
- if that works without Model Importer crashing, then save to TGA again
- if you can't get the model to save to a TGA after adding textures, you may need to go without additional Normal/Bump maps, or may need to reduce the resolution of the textures being used, etc
- you can make changes to each layer's colour, and other settings. Sometimes changing the colour to white makes the model look normal, brighter, etc.
Add additional animations:
- once you have a proven working BAM Custom Model, you can now add additional animations to the same model
- use mixamo to choose another animation with the same model you've been using
- download, and unzip the new FBX model
- with your BAM Custom model still open in Model Importer, now you can "Import Animation" of the new FBX animated model
- this will now be an additional animation added as noted on the bottom of the Window and assigned a new letter
- you can repeat this process to add many more animations
- once you are done, you can save to TGA.
Add Custom Model to Table:
- now add the TGA file to your table in texture Manager, and SAVE the table before adding any code!
- Custom Models need to be saved to the table file before the table is run...otherwise BAM won't see the model when the table starts!
- now you MUST add the required BAM commands to script to add the model (refer to earlier replies in this thread)
- run the table, and use "BAM - Custom Models" menu to position / size the model to where you want it to be
- best to keep height at 0!
- CTRL+C while in this menu, when you are done
- exit table, and in the table script, replace the previous code (to add the Custom Model) with the new code with CTRL+V
- save the table
- add any animation commands you want (read previous posts and look at other examples)
- you may want to add "draw custom models last" command to keep light flares behind the Custom Model . Note: this can cause the Custom Model to appear in front of holograms, and HUDs. You can use additional command parameters to control this more.
Run the table, and enjoy your new animated custom model!
You can now also use a mini playfield to move around the custom model!
Enjoy
)


